Showing posts with label salad. Show all posts

Monday, September 5, 2022

Corn Salad, Elote Style for End of Summer Feasts

Today's Labor Day, tomorrow it's back to work after a wonderful vacation-work trip to The Netherlands and Berlin. Last night we had our annual dinner with friends at Back On The Beach (445 Pacific Coast Hwy, AKA Palisades Beach Road, Santa Monica CA 90402). Today is the last dinner service at Back On The Beach so we were happy to enjoy a meal and the sunset.

We're joining a potluck dinner tonight at our neighbors around the corner. We're looking forward to catching up and hanging out. We're bringing homemade pickles and my version of an elote salad. I'm reprising the post I wrote after a trip to Mexico.  Enjoy!

Mexican street food 

Travel in Mexico and you'll encounter street vendors selling a great number of delicious food snacks. Elote is one of the best. An ear of corn is grilled, dusted with dry cheese, slavered with mayonnaise and seasoned with chili powder and fresh lime juice. The ear of corn is always served whole, sometimes resting in a paper dish or with a stick in the bottom like a corndog.


Elote is delicious but messy to eat. A whole ear of corn takes two hands to manage. And, with each bite, the finely grated Cotija cheese floats into the air, landing on clothing.

Deconstructing elote

Cutting the kernels off the cobs makes the seasoned corn easier to enjoy. In Mexico there is a corn kernel snack called esquires, which employs some of the elote seasonings. The recipe I settled on uses olive oil instead of mayonnaise. That way the salad can be served as a light entrée topped with a protein or as a side dish accompanying grilled vegetables, meats, poultry and fish. A perfect summer recipe.


The best way to cook corn on the cob is a topic of heated debate. There are those who will only boil corn, others who will only grill it. I have seen elote prepared using both. My preference is to strip off the husk and grill the ear so that some of the kernels are charred, adding caramelized sweetness to the salad.

Just the right cheese

What gives elote its distinctive flavor is the combination of spicy chili powder, fresh lime juice and Mexican Cotija cheese. 

Powdery when finely grated, Cotija cheese is salty so you may not need to add salt when you make the corn salad. Often described as having qualities similar to feta and Parmesan, Cotija tastes quite different.


Mexican Corn Salad

Adding finely chopped Italian parsley to the seasoned corn kernels brightens the flavors. Cilantro can be used instead of parsley to give the salad a peppery flavor.

The corn can be prepared ahead and kept in the refrigerator overnight. In which case, do not add the Cotija cheese or parsley until just before serving.

To create a colorful salad, just before serving, toss the seasoned corn and parsley with quartered cherry tomatoes, cut-up avocados and butter lettuce or romaine leaves.

After tossing, taste the salad and adjust the amount of Cotija cheese and chili powder and, if needed sea salt.

Prep time: 10 minutes

Cook time: 15 to 20 minutes

Total time: 25 to 30 minutes

Yield: 4 entrée servings or 8 side dish servings

Ingredients

4 tablespoons olive oil, divided

1/2 teaspoon sea salt 

1/4 teaspoon freshly ground black pepper

4 large ears of corn, husks and silks removed, washed, dried

1/2 cup finely grated Cotija cheese

1/2 teaspoon chili powder

Directions

1. Preheat an indoor grill or outdoor barbecue to hot.

2. Pour 2 tablespoons olive oil into a flat pan and season with sea salt and black pepper.

3. Roll the ears of corn in the seasoned olive oil to coat all sides.

4. Using tongs, place the corn on the grill, turning every 2 to 3 minutes so that some of the kernels char, being careful not to burn the ears.

5. After the corn is cooked on all sides, remove and let cool in the flat pan with the seasoned olive oil.

6. To cut the kernels off the cob, use a sharp chef's knife. Hold each ear of corn over the pan with the seasoned oil and slice the kernels off the cob.


7. Transfer the kernels and the remaining seasoned oil into a large mixing bowl.

8. Add Cotija cheese, chili powder and parsley. Toss well.


9. Drizzle the remaining olive oil over the salad and toss.


10. Serve at room temperature with lime wedges on the side.

Saturday, January 25, 2020

Have a Picnic for Super Bowl Sunday - Kimchi Chicken Wings, Salads & So Much More

A week to go for Super Bowl Sunday and I have my menu planned. No chips or dips. No ordering in (although a sausage pizza with mushrooms, onions and extra cheese would be nice). A great game deserves great food.

I'm making favorite dishes, ones designed to share at a picnic or at buffet-style Super Bowl watching party.


I love my kimchi chicken wings (see below), sticky sweet with heat, moist and tender. Nothing is better except fried chicken the way chef Wes Whitsell showed me for a cooking video we did when he was at Manuela DTLA. His fried chicken is crispy and moist. For the cooking demonstration he made wings, thighs and legs. He doesn't like breasts because they don't have enough flavor. I pretty much agree. For my pot luck contribution, I'm making cut apart wings and legs, the easiest parts to eat at a picnic.


I'm also making carrot salad with golden raisins soaked in lemon juice & seasoned with black pepper, Yukon gold potato salad with charred corn & parsley, a charred corn & vegetable saladroasted beet saladgarbanzo bean salad with charred onions & Lacinato (purple) kale, salt boiled broccoli florets and a buttermilk custard pie I saw Martha Stewart demonstrate on her PBS show.


I'll also make an Italian parsley salad with chopped vegetables and pitted olives and a Little Gem lettuce salad with carrot rounds and feta cheese, served with whole wheat lavash.


Only recently did I discover Little Gem lettuce. First, at Glatt, a kosher market, on Pico east of Robertson and then at the Wednesday Santa Monica Farmers Market at the Garden of Organic stand. At first I thought they were "baby" romaine lettuces. They have a cleaner, crisper flavor, with less water and more crunch. Wrapped in a damp kitchen towel and placed into a plastic bag, the heads will keep fresh in the refrigerator for three weeks.


Here's the recipe I'll use for the Super Bowl (which is exactly the recipe I use when I make the salad at home except sometimes I'll trade out the feta for blue cheese).

Crispy Little Gem Lettuce Salad

When making the salad, leave the leaves whole so they don't wilt.

For the olives, use any kind you enjoy. We like Castelvetrano Green olives, which can be found pitted for easy use, although olives taste best when not pitted.


Serves 4

Time to prepare: 20 minutes

Ingredients

2 heads Little Gem Lettuce, leaves removed whole, washed, pat dried

1 large carrot, washed, ends removed, peeled, cut into thin rounds

1 large tomato, stem end removed, washed, pat dried, cut into dime size pieces

1 cup pitted olives, roughly chopped

1 scallion, ends removed, washed, brown leaves discarded, cut into paper thin rounds (optional)

1/2 cup feta, pat dried, crumbled

1 medium avocado, washed, peeled, pit and any brown spots removed, cut into dime sized pieces

1/2 cup homemade croutons (optional)

2 tablespoons olive oil

1/4 cup balsamic vinegar, reduced over a low flame to 2 teaspoons, cooled

Sea salt and freshly ground black pepper to taste

Directions

Lay the Little Gem leaves in the bottom of a serving bowl. Sprinkle on the carrots, tomatoes, olives, scallions (optional), feta, avocado and croutons (optional).

Just before serving, season with sea salt and black pepper, drizzle on olive oil and reduced balsamic vinegar.

Serve with a knife and fork.

Kimchi Chicken Wings

Chicken wings are sold whole, the drumstick only or the two-bone part. If you prefer one part of the wing over another, buy only those. The whole chicken wing will be less expensive and the wing tips can be roasted and used to create stock.

Do not use the whole chicken wing, which is too difficult to eat. 


I prefer preservative-free kimchi. I have been enjoying Mommy Boss napa cabbage kimchi. Read the label carefully because there are different kinds of kimchi, I would recommend only using cabbage kimchi without dried shrimp.

Serves 4

Time to prepare: Marinate overnight, prep 20 minutes, bake 60 minutes

Ingredients

2 pounds chicken wings

1 cup kimchi, without preservatives

1/2-3/4 cup brown sugar, depending on taste

1 medium yellow onion, washed, pat dried, peeled, root and stem removed, thin sliced from root to stem

1/4 cup kimchi liquid

1 tablespoon olive oil

Directions

Thinly slice kimchi and mix together with onion slices, brown sugar, kimchi liquid and olive oil.

Add chicken wing parts to marinade. Mix well. Place in a covered bowl or sealed plastic bag. Refrigerate over night.

Preheat oven to 350F.

Prepare a roasting pan. Line the bottom with aluminum foil. Because the drippings are sticky (and delicious!) I place a Silpat sheet on top of the aluminum foil so I can easily retrieve the bits of caramelized onions and kimchi. Place a wire on top of the aluminum foil and Silpat sheet.


Place the chicken wings on top of the wire rack, allowing space between each part to allow for even cooking. Reserve the liquid marinade with the onions and kimchi.

Place wings into preheated oven.

While the wings are roasting, place the reserved marinade into a small sauce pan and reduce the liquid by 1/2 over a low heat.

Remove wings from the oven after 30 minutes.

Turn wings over and baste with reduced marinade, placing onion and kimchi slices on each wing.

Return to oven.

After 30 minutes, remove and check for doneness. The onions and kimchi slices should be lightly browned and beginning to crisp. The wings should be tender. If not, return to oven and continue baking. Check every 10 minutes for doneness.

Serve hot as an appetizer or on top of steamed rice. The wings are delicious at room temperature, perfect for a picnic. However they are served, have a good supply of napkins available.

Wednesday, January 31, 2018

Go Green for Super Bowl Sunday! Cook Easy-to-Make Roasted or Grilled Artichokes

We are planning a Super Bowl Sunday party. My plan is to serve "picnic" food. Carrot salad, potato salad, Little Gem green salad, Persian salad, crispy fried chicken, brown sugar salmon and roasted artichokes.

Super Bowl Sunday food should be fun, delicious and healthy.

Spring is happening and artichokes are showing up in our farmers markets. The dark green vegetable, prized by cooks, is healthy and easy-to-prepare.
Looking at an artichoke, with its hard exterior and sharp pointed leaves makes me wonder how anyone figured out they would be good to eat. With a small amount of effort, that tough looking exterior gives up the wonderfully savory flavor bits at the end of the each leaf.
Choosing a good artichoke

Whether you find one that is the size of your hand or a larger one the size of a soft ball, give it a squeeze. If the artichoke feels solid, you've found a good one. An artichoke past its prime will be squishy like a child's squeeze toy. Make sure all the leaves are green. Don't buy an artichoke with brown or blackened leaves.
Having a sharp pair of scissors or kitchen shears, a pairing knife and a chefs knife will make breaking down the artichoke easy.

Roasted or Grilled Artichokes

One person can easily eat one artichoke the size of your hand. The larger artichokes will feed 2-3 people as an appetizer or a side dish. 

Serves 4

Prep Time: 10 minutes

Cooking Time: 30-35 minutes

Total Time: 40-45 minutes

Ingredients

4 medium sized or 2 large artichokes, washed
1 tablespoon kosher salt
2 tablespoons olive oil
1 teaspoon sea salt
1/2 teaspoon black pepper
1/4 cup sweet butter (optional)
Directions

Preheat oven to 350F. Or, set grill (indoor or outdoor) to medium-high.

Place a large stock pot on the stove on a high flame. Add kosher salt. Bring to a low boil. Cover.

To roast the artichoke sections after boiling, cover the bottom of a baking sheet with parchment paper, a Silpat sheet or a piece of aluminum foil. Set aside.

Using scissors trim off the pointy end of each artichoke leaf.

Trim off the stem of each artichoke, flush to the bottom. Discard the stems.

Give each artichoke a flat-top haircut. Place the artichoke on its side. Using a chefs knife, trim off the top 1/4" of each artichoke and discard.

Place the artichoke on the cutting board. Using a chefs knife, cut each artichoke in half, from bottom to the top. Cut each half into two pieces. If the artichoke is large, cut those four pieces in half, creating eight segments.

Working quickly, because the inside of the artichoke will discolor when exposed to air, use a sharp pairing knife to remove the fuzzy part on the inside of each section. Rinse the artichoke sections and discard the fuzzy parts.

Place all the artichoke sections in the boiling salted water. Cover and cook 10 minutes.

Using the pairing knife, test one of the artichoke sections. The knife should easily go into the fleshy part on the bottom of the leaves. If the knife doesn't go in easily, cook another 5 minutes but beware not to over cook the artichokes. They should be firm not mushy.

Place a colander or strainer in the sink. Pour the hot salted water with the artichoke sections into the colander and drain.

Transfer the artichoke sections to a mixing bowl. Drizzle with olive oil. Season with sea salt and black pepper. Toss well to coat.

If grilling, place the artichokes on the pre-heated grill. Turn frequently to avoid burning. Remove when grill marks appear on all sides.

If baking in the oven, arrange the artichokes on the prepared baking sheet, leaving room between the sections.

Place in the oven and cook 15 minutes. Using tongs, turn the sections over and place back in the oven another 15 minutes so they cook evenly.

Remove the artichokes from the oven and serve hot or at room temperature with sea salt, black pepper and small dishes of melted butter (optional).

If serving with melted butter (optional), melt the butter in a small saucepan being careful to avoid burning.

Wednesday, December 7, 2016

Cold Nights, Warm Food - Potatoes Au Gratin and Steak Charred on a Carbon Steel Pan

It's comfort food time. Cold nights call for warm dinners with deeply satisfying dishes.

What makes you feel good in cold weather? What about a vegetable soup flavored with roasted tomato sauce and filled with roughly chopped carrots, green cabbage, shiitake mushrooms and string beans? Or spaghetti tossed with charred cauliflower buds and shallots with an anchovy-butter sauce?

I made those last week and they were delicious. Tonight I wanted meat, a starch and a green. Pretty basic stuff. Add in a Prairie vodka martini with an olive and I was definitely comforted.
Usually when I cook a steak, I make mashed potatoes with butter, half and half and sautéed scallions. Tonight I wanted something different. For some reason the idea of potatoes au gratin seemed like the way to go. I'd still have the soft potatoes to contrast with the steak but the au gratin would give me a crunchy top.

The green was my favorite: an escarole salad with blue cheese, pickled green beans, fresh chopped tomatoes (this is California so it's easy to find flavorful heirloom tomatoes at the farmer market) and carrot rounds with an olive oil and reduced balsamic dressing.

This entire deliciously comforting meal took 50-60 minutes to prepare. In actual work time, you'll do 20 minutes and otherwise be waiting for the potatoes to do their thing.

First thing is get the potatoes au gratin going. The recipe for that is below.

Because the steak should be hot from the oven and loses quality if it has to wait around for the other dishes, make the salad next. If you can't find escarole, which I learned to love when I lived in Providence, Rhode Island, use red leaf or romaine lettuce.

The salad and steak
Escarole is slightly bitter and the leaves are rough, so it holds up well in a tossed salad. Tear the leaves into bite sized pieces, peel the carrot and make paper thin carrot rounds, add a 1/4 cup of another vegetable like salt steamed green beans (I make pickled green beans) or cooked corn kernels in the summer, 1 tablespoon of chopped pitted olives and homemade croutons if you have them.

Dress with the olive oil and reduced balsamic (you make that by putting 1 cup of balsamic into a small saucepan on a low flame and reducing the volume to 1/4 cup, cool and use in the normal proportion except the balsamic is now slightly sweet) after the steak is cooked and you are ready to eat.
There are lots of great ways to cook a steak. I'm really happy with the results I get using a carbon steel pan, which, I know, isn't easy to find. In Manhattan, Zabar's on the Upper West Side sells them (second floor). In LA, Surfas in Culver City has them until they sell out, then the wait can be awhile until the next shipment from France gets through the traffic jam in LA Harbor.
Carbon steel chars vegetables and a steak equally well. It is easy and the results are fantastic. A cast iron pan is a close substitute but in my opinion not as good. Before charring the steak, heat the pan without any oil until the metal starts to smoke, To use a high-temperature pan requires that you have a good quality exhaust fan in the hood over your burners. Otherwise, the smoke will set off the fire alarums and the house will fill with smoke. Not good.

Once the pan is smoking, add a small amount of blended oil (80% canola, 20% olive oil). A really small amount, maybe a 1/2 teaspoon is all you need. Throw in a handful of shredded onions. Toss with tongs so they char not burn. Throw in a handful of thinly sliced shiitake mushrooms. Maybe drizzle on another 1/2 teaspoon of blended oil. Toss, turn and don't burn. When the onions and shiitakes are lightly browned, transfer them to a plate and set aside.
The steak needs to be a good quality either bone-in or fillet. Allow the meat to reach room temperature. Dredge in olive oil then season with sea salt and freshly ground black pepper. Both sides.

Get that carbon steel pan going again. When the metal is smoking, use tongs to gently place the steak into the middle of the pan. Allow the meat to sear 3-4 minutes, then use the tongs to turn it over. Sear another 3-4 minutes. Then place the pan and the steak into the preheated 350F oven. Depending on the thickness of the steak, bake 5-10 minutes. Use a pairing knife to cut into the middle to test for doneness.

Once the steak is the way you like it, remove from the oven. Put the charred onions and shiitakes back in the pan and lay a sheet of aluminum foil over the top. Let the meat rest 5 minutes. That will also heat the veggies.

Serve hot with the potatoes au gratin straight out of the oven and the escarole salad crisp and cold.

Don't forget the Prairie vodka martini with an olive.

Ok, now the recipe for the potatoes au gratin.

Potatoes Au Gratin 

Serves 4

Time to prep: 20 minutes

Time to cook: 30 minutes to salt boil, 30 minutes to bake, 2-5 minutes to broil

Total time to cook: 72-75 minutes

Ingredients

4 medium sized good quality potatoes, preferably King Edward or Baby Yukon, washed
1/4 cup half and half or whole milk
1/2 stick sweet butter (no salt)
1 cup white cheddar cheese, roughly grated
1 teaspoon kosher salt
1/4 teaspoon sea salt, to taste
1/8 teaspoon freshly ground black pepper, to taste
1/4 cup bread crumbs, fine, preferably homemade

Directions

Preheat oven to 350F.

Fill a quart sized pot with water. Add kosher salt and potatoes, washed but not peeled. Bring to boil. Cover and cook 30 minutes. To test for doneness, insert pairing knife into each potato. The knife should have some resistance when inserted. Drain, set aside to cool.

When cool, use paring knife to remove skin only. Reserve skin to sauté at breakfast and serve with scrambled eggs and bacon.

So you can work like you're on an assembly line, place all the ingredients on a cutting board around a rectangular or a pie sized, bake-proof pan with a low lip, about 2".

Make thin potato slices (about 1/4"). Use a pairing knife for better control. This part is a bit tedious because making so many thin slices can take a few minutes. The result is worth your patience.

You are going to make layers in the baking pan in the following order: overlapping layer of thin potato slices, then paper thin slices of butter, season with sea salt and freshly ground black pepper, then potato slices then butter slices and seasoning and so on until all of the potato slices are in the baking pan.
Place a final layer of thin butter slices on the potato slices and season. Pour in the half and half or whole milk. Sprinkle on grated white cheddar cheese and finish with bread crumbs.

Place baking pan on a baking sheet and place in oven 30 minutes.

At this point the potatoes are cooked and can be reserved and reheated just before serving.

When everyone is sitting at the table, ready to eat, set oven to broil to brown the topping. Be careful not to burn. If broiling makes you nervous, skip this step and place the potatoes into a 350F oven to reheat for 5 minutes.

Serve hot.

Monday, September 15, 2014

Summer’s Last Salad - Charred Corn and Chopped Vegetable Salad

How can summer be over? Honestly, it seems only a few weeks ago that we were in the park watching 4th of July fireworks. Now every day the sun leaves the sky earlier and earlier. 

Walking through our farmers market, the tell-tale signs that fall is closing in are everywhere. The mounds of corn at our farmers market are smaller. The tomatoes aren’t as acidic-sweet as they were last month. The peaches still look beautiful but they aren't as full of flavor with firm flesh.
In these last moments before temperatures plunge and skies cloud over, now is the time to seize the day and celebrate summer before it disappears completely.
Dylan Thomas said that we should “rage against the dying of the light” (Do Not Go Gentle Into That Good Night). Personally I prefer a good chopped salad to ragging against the inevitable.

Charred Corn and Chopped Vegetable Salad

Always examine the ears of corn closely before purchasing. That is always true but at the end of summer, choosing ears carefully is even more important. Ideally the husks should be green and pliant, the tassels moist and the kernels plump. Dimpled kernels are a sign the corn is losing its sweetness. A worm or two isn't a problem. The presence of a live worm says the corn is organically grown. Just cut that part of the cob off and discard.

Use whatever fresh vegetables you enjoy.

My preference is to cut the vegetables into a small dice so they are similar in size to the corn kernels.

Charring the corn adds a smoky-sweetness.

Serves 4

Ingredients

1 basket or 2 cups cherry tomatoes, washed, dried, cut into eighths
2 ears fresh corn or 4 cups of kernels, husks and tassels removed, washed, dried
1 large bunch Italian parsley, washed, dried, leaves only, roughly chopped
1 large carrot, washed, peeled, stem cut off and discarded, cut into a fine dice
1 medium avocado, washed, skin and pit removed, small dice
1/3 cup green and black olives, pitted, finely chopped (optional)
1/2 cup feta cheese, crumbled (optional)
1 red or yellow pepper, washed, dried (optional)
1 cup croutons, homemade preferable
1/4 cup olive oil
1 tablespoon reduced balsamic vinegar (made from 1/4 cup balsamic vinegar reduced on a low flame)
Sea salt and freshly ground pepper to taste

Directions

Place the ears on a plate and drizzle with olive oil. Season with sea salt and black pepper. Char the ears of corn either on the barbecue or in the oven. On the barbecue turn the ears frequently over medium-high eat to char but not blacken. Remove and let cool. If in the oven, preheat to 350F, place the ears on an aluminum foil or Silpat lined baking sheet and roast fifteen or twenty minutes, turning every five minutes for even cooking.

When cooled, remove the kernels from the cobs with a sharp chefs or paring knife. Place in a large mixing or salad bowl.

Reduce the balsamic vinegar over a low flame. Allow to cool.

If using a pepper, char a whole red pepper on the barbecue or over an open flame on the stove. When the skin has turned black, remove and allow to cool. Under a stream of cold water, rub off the blackened skin. Place over a bowl. Using a paring knife, remove the stem. Cut open to release and capture the oils inside the pepper. Discard the seeds. 

Finely dice the cooked pepper. Add 1/4 cup to the salad. In a sealed jar, reserve the remainder to be used in stews, soups or another salad. The cooked pepper will keep fresh in the refrigerator for 2-3 days. Add the reserved pepper oil to the salad.

Add the cut up pepper (optional), cherry tomatoes, avocado, parsley, olives, carrots and croutons to the bowl with the corn kernels. Toss well. If desired, add crumbled feta cheese.

Season the salad with olive oil, reduced balsamic, sea salt and freshly ground black pepper. Toss well and serve.

Variations

Use grated cheddar or crumbled blue cheese instead of feta.

Add a chopped protein like cooked chicken breast or grilled shrimp.

Add 1 tablespoon chopped red onions or scallions.

Add 1/4 cup fresh chopped bell peppers, preferably red and yellow.

Add 10 asparagus spears, woody bottom part removed, washed, charred on the barbecue or roasted in the oven, chopped.


Tuesday, July 15, 2014

Bring Your Own Food on the Airplane For An In-Flight Picnic


You can almost see the French cheeses and crackers on a tray with glasses of bubbly Champagne, an opulent first course meant to stimulate the appetite before a gourmet entree — chateaubriand, perhaps, or line-caught salmon with roasted asparagus. If you listen closely, you can hear the flight attendant whispering to leave room for the hot fudge sundae with fresh whipped cream and toasted almonds.
In coach, nothing is free. Sure, for now the sodas, water, and coffee are still complimentary, but if you’re hungry, have your credit card ready. Alaska Airline’s cheeseburger with chips is a relative bargain at $6, but Delta charges $9.49 for their hamburger and $10.99 for one of their wraps, and a vending-machine-type sandwich or salad is $9.99 on American Airlines. 
You’ll do a lot better if you brown bag it and pretend you’re on a picnic.

Choose food with staying power

Pack food that travels well: trail mix, your own tea bags and sunflower seeds. Fresh fruit is good, but avoid berries that bruise easily. Carrot and celery sticks are great, as are sandwiches. One caveat: Remember that you can only take 3 ounces of any liquid through airport security, so go easy on the salad dressing or condiments you bring.

Assemble sandwiches carefully

Sandwiches are an easy-to-eat option for in-flight meals because everyone gets to choose what they want. There are an infinite number of combinations from ham and cheese on rye to a grilled shiitake mushroom and watercress sandwich for vegetarians. Meat eaters in the family can go crazy and build a feast of turkey breast, salami and provolone on deli rye.
To keep your bread pristine, put the mayo or mustard (as well as tomatoes or lettuce) between the meat slices, not directly on the bread. Or, for really long flights, wrap the bread, meat and cheese in plastic wrap sealed in Ziploc bags and assemble the sandwich with condiment packets while you’re flying.
Avoid fillings that might disturb your fellow passengers. Overly messy food or condiments, like chopped liver and garlic paste are a bit too aromatic for an airplane’s close quarters.

Keep it fun for the kids

If kids like peanut butter and jelly sandwiches, stop at a camping supply store and pick up a couple of refillable plastic tubes. The kids can choose their favorite peanut butter and jam and pre-fill the tubes at home. Now they have something to look forward to on the plane.

A salad bar in the air

Make carrot, potato or pasta salad at home and pack it in plastic containers. Keep a green salad fresh by assembling it when you’re ready to eat. (A tip: You can pick up a couple of the empty salad dressing containers at your grocery store’s salad bar.) At home, give everyone the chance to pack their favorite salad fixings. Besides lettuce or arugula, bring chopped tomatoes, scallions, croutons, olives, hardboiled egg slices, crumbled cheese, and carrot rounds — those salad-dressing containers work well for these items, too. It's a little more ambitious, but a grilled vegetable salad is well-worth the extra effort.  A treat anytime, at 30,000 feet, the sweetness of charred vegetables is especially delicious.
Besides salad dressing in one of those little containers, bring sea salt and black pepper as well.
Want to make your salad even more delicious? Try this simple vinaigrette. Just heat ¼ cup of balsamic vinegar over a low flame until it’s reduced to a teaspoon, then mix it together with 2 tablespoons of olive oil. The reduced balsamic adds depth and natural sweetness to the dressing.

Let your deli do the work

To glam up your meal, nothing says classy like a charcuterie plate and nothing is easier to prepare. Pick up a selection of favorite meats, pâtés, cheeses, and a small baguette or a selection of rolls at your favorite deli. Bring along some olives, a few cornichons — those tart French pickles — and a packet of Dijon mustard, and you won’t care what the first-class passengers are eating.

Celebrate your sweet tooth

For dessert, go wild and stop at your favorite bakery. Fresh fruit tarts don’t travel well, but cookies, muffins, scones and even eclairs do quite nicely if packed in plastic containers, like the ones used at the deli or the lidded containers sold by Ziploc and Glad.

Don’t forget the basics

Bring paper plates, napkins and plastic utensils so you can feast in style. A plain kitchen towel makes a perfect airplane tray tablecloth and helps with spills. Pack everything in plastic containers. Be a good neighbor and carry plastic bags for easy clean up so you don’t leave any trash behind. Take along sea salt and freshly ground pepper in empty 35mm film canisters (remember those?) or even the plastic containers used for prescription medication.

Why we love flying

With all the inconveniences, we easily forget that flying is a manmade miracle. Think about it, a hundred-plus people and all their luggage powering through the sky above the highest clouds. Amazing. If only we didn’t feel so claustrophobically uncomfortable, we could return to the wonder we felt as kids when we pressed our noses against the window and looked down at the earth below.
We can’t regain that lost innocence, but enjoying a delicious home-prepared meal, maybe we can reconnect with the fun of flying. A really good sandwich, some olives, and a crisp Fuji apple from the farmers market can do that for you.

Thursday, February 7, 2013

Roasted Vegetable Salad

Even in February, the farmers markets in Southern California have plenty of summer greens. Plump bunches of romaine, red leaf lettuce, arugula and Italian parsley are stacked high on the farmers' tables.

To create a healthy, refreshing dish, all you have to do is rinse the greens in clean water, flick dry and toss with a simple dressing.
But this is winter and another group of vegetables come into their own when the sun's rays have weakened, the days are shorter, and the temperatures lower.

Black kale, turnips, beets and celery root are now in their prime and require only a little more effort to create a delicious salad.

Using an oven's heat to bring the best out of vegetables turns starch into sugar and coaxes crispness out of leafy greens.

For Zester Daily I wrote an easy-to-make recipe for a roasted vegetable salad that is delicious when the chill is in the air. A salad with a bit of warmth is a perfect accompaniment for roasted meats and seafood or a hearty braise: A Winter Pick-Me-Up: Roasted Vegetable Salad.


Wednesday, May 27, 2009

Grilled Vegetables and Grilled Vegetable Salads

Although most of the world thinks there are no seasons in Southern California, those of us who are natives know that isn't the case. In the winter, we are very definitely cold. When my wife and I walk on the beach, she wears a full compliment of winter wear: fur lined hat, gloves, sweater, and jacket.

We also feel winter's grip when the sun disappears in mid-afternoon, requiring lights to be turned on before 5:00pm. With the cold and darkness, these are not easy times. Certainly there are pleasures to be gotten from a crackling fire in the fireplace, hot soups filled with savory bits, and braised meats surrounded by an array of root vegetables. Admittedly those are sweet comforts, but they are brought front and center because our sagging spirits need propping up.

Spring in Southern California is a different matter altogether. Although there is still fog aplenty at the beach where we live, the days benefit from the warmth of the sun's strengthening rays.

Besides sensing the increase of daylight and warmth, we also know that spring has arrived because the local farmers' markets welcome back long forgotten friends. Corn on the cob, green garlic, all manner of flowers, squash blossoms, and stone fruit beginning with plums, pluots, apricots and apriums.

With the abundance of locally grown produce, the high points of my week are visits to the Wednesday Santa Monica and the Sunday Pacific Palisades Farmers' Market.

As a child I avoided contact with vegetables as much as I could. My mother's treatment of produce was ungenerous. String beans were boiled in salted water and then extracted, limp and submissive. Corn and English peas were taken from the freezer and overcooked in the same salted water, their flavor saved only by the large pat of butter that joined them in the serving bowl.

Leaving home, I pursued a different path, exploring the local farmers' markets and experimenting with vegetables I had only heard about but never eaten. One of my chief discoveries was that vegetables, like hamburgers and steaks, benefited from grilling.

Who does not love carrots drizzled with olive oil, seasoned with sea salt and black pepper and cooked on a hot grill? Their carrot-essence acquires a caramelized sweetness that is irresistible. And what about the improvement of artichokes, Japanese eggplant, broccoli, corn, squash, zucchini, and even thin slices of Yukon Gold potatoes similarly coated with seasoned olive oil and placed on the grill?

So powerful are those flavors, I have to restrain myself from grilling every night.

Just about any vegetable can be grilled. Some, like tomatoes and asparagus, cook quickly and require an attentive hand to prevent charring. Others, like corn on the cob, take a bit longer and need to be turned frequently for even cooking. 
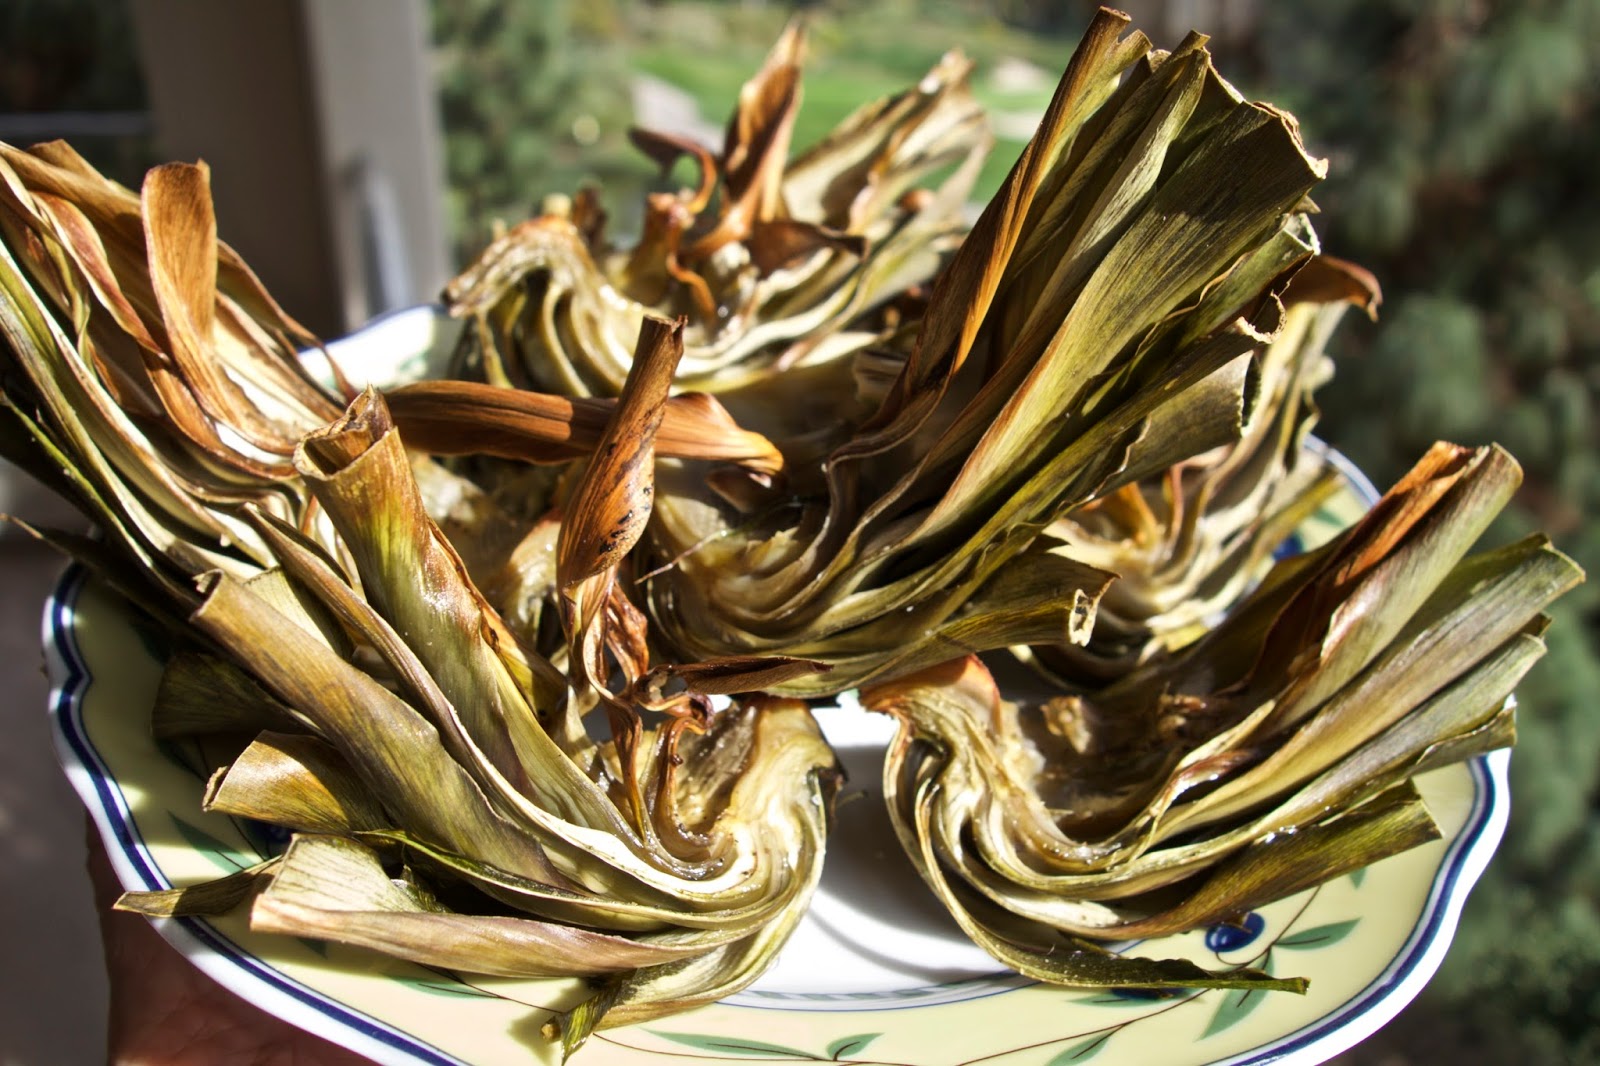
A few, like artichokes, require fifteen-minutes in boiling water before heading to the grill.

Grilling pulls out the essential flavor of each vegetable. Those qualities are enhanced by a simple dredging in olive oil seasoned with sea salt and freshly ground pepper.

Once grilled, the vegetables can be served straight off the grill as a finger-food appetizer, a side dish, or even as an entree. But they can be so much more.

Chopped up, grilled vegetables can fill out a parsley salad. Mixed with couscous they make a savory side dish.

Once you start grilling vegetables, they'll become a secret weapon in your culinary adventures.

Grilled Vegetables

Yield 4 servings
Time 45 minutes

Ingredients

4 large carrots, washed, peeled, cut into slabs 1/4" thick, 2" long
2 broccoli crowns, washed, cut into slabs 1/4" thick, 2" long
1 bunch asparagus, medium sized or thick, washed, white ends trimmed off
1 ear of corn, husks and silks removed, washed
2 tablespoons extra virgin olive oil
1/4 teaspoon sea salt
Pinch of black pepper

Method

Turn the grill on to medium and preheat for 10 minutes.

In a bowl, toss the vegetables and season with the olive oil, sea salt and pepper. Using tongs, put the vegetables on the grill.

Close the cover and cook for 2-3 minutes. Turn and cook another 2-3 minutes, checking frequently to prevent burning. How long each vegetable takes to cook depends on your grill, the vegetable, and the thickness of the slices.

Have a serving plate handy so you have a place to put the cooked pieces when they're ready. Serve hot as a side dish or room temperature as finger-food appetizers.

Grilled Vegetable Chopped Salad

Cut the corn kernels off the cob. Roughly chop the other vegetables. Toss together. Add a bit more olive oil, taste, and adjust seasoning with sea salt and pepper.

Grilled Vegetable and Parsley Salad

With the grilled vegetables as a starting point, the salad can be expanded by adding elements. In this case, parsley.

Ingredients

3 cups grilled vegetables, roughly chopped
1 bunch Italian parsley, washed, most of the stems removed, leaves finely chopped
1/2 cup crumbled feta 
Olive oil
Sea salt and pepper

Method

Mix together the chopped vegetables and parsley. Add more olive oil as needed, taste and adjust seasoning with sea salt and pepper.

Variations

Add 1 avocado, peeled and chopped

Add 10 fresh cherry tomatoes, quartered

Add 1 tablespoon chopped scallions or red onion

Substitute cilantro for parsley

Add 1 hard boiled egg, finely chopped

Couscous Salad with Grilled Vegetables and Parsley

The salad becomes more substantial with the addition of easy-to-make couscous.

Yield 4 servings
Time 20 minutes

Ingredients

1 cup whole wheat couscous
1 1/4 cups water, boiling
Olive oil
Sea salt and pepper

Method

Mix together 1 cup whole wheat couscous, the heated water, and 1 tablespoon olive oil. Stir well, cover with plastic wrap and set aside 10 minutes, then fluff and cover again until needed.

In a bowl, mix together the chopped vegetables, parsley, and prepared couscous. Add a bit more olive oil, taste and adjust seasoning with sea salt and pepper.

Variations

Add 6 grilled mushrooms, roughly chopped

Add 1 fresh avocado, roughly chopped

Add 10 grilled shrimps, roughly chopped

Add 1/4 cup crumbled feta or goat cheese

Saturday, December 27, 2008

Holiday Vacations, Vietnamese Food & A Lobster Roll Lunch

How lucky we are that holidays allow us to take time off from our daily routines. Right now we are enjoying the in-between time that begins with the day after Christmas, extending until the day before New Year's Eve. In the retail world this is the make-or-break period when the year's profits will tip one way or the other. Besides the year-end sales, a few other price breaks are helping make the season merry.

Lower gas prices definitely help. Filling up for half the cost of a few months ago continues to be a treat. On the food front, while many commodities continue to cost more, a very few have come down in price. One in particular, lobster, surprises and delights. Mark Bittman recently wrote about lobster prices coming down on the East Coast. Even in LA, prices have fallen. At Gelson's, the upscale supermarket, lobster has been on sale for most of December.

For the holiday our family makes a yearly pilgrimage to a week's time share we bought when the boys were young. Less than two hours drive and we're in our home away from home.

Driving south from LA, we have an excuse to stop in Little Saigon, where we can have lunch at Ha Noi and shop at ABC Supermarket. At Ha Noi we had three of our favorite dishes: a shrimp spring roll, pho ga (noodle soup with chicken), and vermicelli noodles with bbq pork and shrimp.

In Vietnamese supermarkets like ABC, the cost of fresh produce, meat, poultry, and seafood tends to be 1/3 to 1/2 the price in mainstream markets. Which means we splurged and bought a lobster and lots of produce, shrimp, and a crab.

Our first lunch on vacation was a simple one: lobster salad and a Persian cucumber salad. The salads are easy to make, fresh tasting, and delicious courses to serve over the holiday or to help you welcome in the new year.

Lobster Salad

Yield: 4 servings
Time: 45 minutes

Ingredients

2 lobsters, 1 1/2 pounds each
1 cup corn kernels
1 cup Italian parsley, washed, finely chopped
1 stalk celery, washed, finely chopped
1/4 cup capers, finely chopped
2 scallions, washed, ends trimmed, finely chopped, white and green parts
1/4 - 1/3 cup mayonnaise
Olive oil
Sea salt and pepper
Cayenne (optional)

Method

The lobsters can be steamed or grilled, either technique is fine. Use the one that's easiest. If steamed, boil 2" of water in a large pot. Hold the live lobsters, head down in the boiling water for 10 seconds. Cover, reduce to a simmer for 10 minutes. Take the lobsters out of the pot, let cool so they can be handled, remove the meat, and clean away the liver.

If you want to make lobster fume for sauces or a soup, reserve the cooking water. Add any liquid inside the lobster and all the shells to the cooking water, simmer for 20 minutes, reducing the liquid by half, strain, and discard the shells and solids. Add the fume to a finely diced saute of olive oil, celery, potatoes, carrots, onions, and garlic, simmer for 30 minutes, strain, use the fume as the base for a pasta sauce or lobster-vegetable soup.

Saute the corn in olive oil, seasoned with sea salt and pepper until lightly browned. Cut the lobster into bite sized pieces and mix with the other ingredients. Season to taste with sea salt, pepper, and (optional) a light dusting of cayenne.

The lobster salad can be served many ways: with romaine lettuce leaves, grilled rolls or a halved baguette with drizzled olive oil or a heated tortilla, either traditional or ones made from brown rice (found at Trader Joe's and favored by my wife, Michelle).

Thursday, May 22, 2008

Wilted Spinach Salad Takes Center Stage

Everyone has an all-purpose dish that can be modified in clever ways by changing a few key ingredients. For my mother, it was the casserole. For me it’s usually pasta but on those nights when my wife wants to “go green” I turn to an old stand-by: a wilted spinach salad.

Versatile spinach works cold in a salad or heated by sautéing or boiling. A hot dressing brings spinach to a middle ground: mostly raw with some leaves wilted from the heat of the dressing. Sautéing the dressing allows for a great variety of ingredients: Italian sausage, anchovies, mushrooms, shrimp, bacon, chicken, duck, chicken livers, or purely vegetarian. As far as I can tell just about any pizza topping would work on a wilted spinach salad, excepting maybe pineapple.

I invite everyone to send in suggestions. I know I’ve only scratched the surface of this infinitely variable dish.

Wilted Spinach Salad with Shrimp, Avocado, and Olives
Yield 4 servings
Time 20 minutes

Ingredients

1 large bunch spinach, the root ends trimmed and discarded, thoroughly washed to remove the grit
2 garlic cloves, peeled, thinly sliced
2 slices bacon, finely chopped (optional)
6 mushrooms (brown or shiitake), washed, thinly sliced
1 carrot, peeled, cut into rounds 1/4" thick
2 shallots, peeled, cut into thin rounds
12 shrimp, medium sized, washed, deveined, sliced in half (optional)
12 olives (oil cured black, green split, or Castelvetrano green), pitted, quartered
1 small avocado, peeled, roughly chopped
1/4 cup croutons, preferably homemade
2 tablespoons feta, crumbled (optional)
4 tablespoons olive oil
4 tablespoons balsamic vinegar
Sea salt and pepper

Remove the stems from the spinach. Put the leaves into a large salad bowl. Finely chop the stems. To make the hot dressing put 2 tablespoons of the olive oil into a sauté pan on a medium flame and lightly brown the spinach stems, garlic, bacon, mushrooms, carrot rounds, and shallots. Remove from heat and set aside. In a small sauce pan reduce the balsamic vinegar to 1 tablespoon. In a separate sauté pan drizzled with olive oil, cook the shrimps until pink about 2 minutes, then set aside.

When you’re just about to serve the salad, reheat the dressing on a medium flame. Add the rest of the olive oil, olives, and avocado.

Using a rubber spatula pour the hot dressing over the spinach leaves. Drizzle with the reduced balsamic vinegar. Top with the shrimp, croutons and if you want the feta. Taste and adjust the seasoning with sea salt and black pepper.

Variations

The hot dressing can be kept vegetarian by using olive oil, shallots, and garlic. Most vegetables can be added to the sauté: zucchini, carrots, mushrooms, English peas, sugar snap peas, broccoli, or tomatoes. Try tofu or vegetarian patties as well.

A riff on a chef salad, in the dressing sauté baked ham and turkey breast with shallots; add cheese (cheddar or Swiss) and chopped tomatoes when you toss the salad.

Borrowing from the classic frisee salad, use bacon or lardoons crisped in the sauté, topping the salad with a fried egg. A variation on a variation: instead of a fried egg, use a hard boiled egg, sliced or chopped.

Sauté 1/4" rounds of Italian sausage with slices of red pepper, onion, and garlic to make a wilted salad version of a sausage hero.

Grilled or sautéed chicken livers with mushrooms, onions, and lots of garlic.

Add several anchovies and a dusting of pepper flakes to the onion-garlic sauté.

For the meat use slices of roast duck or chicken (dark meat preferably since it has more flavor); put shiitake mushrooms in the sauté.

Pickle Me Up! It's Thanksgiving!

Pickles are delicious anytime of the year. For Thanksgiving they are especially good. Their crunch and acidity counterbalances the delicious...